Got to Penzeys a couple weeks ago. Spent what seems like an obscene amount of money on herbs and spices and…stuff. I was a tad surprised at how much it cost but when you factor in how long it has been (many years) and all the things that I am just getting for restocking the kitchen and how long it will last us, it’s not so bad.
Also, you don’t realize just how much smoked spanish paprika you use until it is gone.
I am suddenly hit with the urge to make those things that are not stuff you eat but the stuff that goes into what you eat. Chicken stock, both regular and asian, italian sausage, sage sausage, 3 chili sprinkle, chili powder, spiced clarified butter (niter kibbeh but also other sets of flavors like a curry-ish one and an herb-y one), because they are delicious for cooking and so so so terribly awesome for popcorn. When you cook off all the water in the butter it then doesn’t shrivel your popcorn when you drizzle it on. The problem is that I want to make so many things and so many things are not a good idea when we are trying to minimize the volume of things being transported across the country.
I imagine it will be easy enough to offload that stuff to people here.
Today marks the end of the last full week at David’s job. Just a handful of days and he is done. It will be the relief of an ugly burden.
You know what? Today is a day for grilling steaks! We will celebrate! Steak and beer and corn with chili butter, that is what today says to me.
Category Archives: Delicious
Rigatoni with squash, collard greens and italian sausage
You should eat this, it’s digdang delicious!
You need:
1 medium-ish butternut squash
1 bunch collard greens
1 pound bulk spicy italian sausage
1 orange
1 tbl sesame oil
1 pound rigatoni
parmesan cheese
Early in the day, like say 4 or 5 hours before you want to eat, take that butternut squash and stab it all over like you’re a crazy clown faced squash killer and pop it into the microwave for 8 minutes. Then just leave it alone. It’s a proven fact that the insides of squashes need only 1/3 more hydrogen atoms to become as hot as the sun once they are microwaved. Leave the damned squash alone for a few hours.
…Later in the day when your squash has cooled to manageable temperatures…
De-rib your collards and tear them up into bite sized pieces, rinse well and set aside.
Zest the hell out of that orange, then cut it open and squeeze all the juice out and mix it with the zest and then add the sesame oil. Set aside.
Grab that squash and slice it open, dig them seeds out from its belly. You will notice that the squash is not evenly cooked. The part around the bulb is cooked pretty well, but the rest of it is not quite done. This is exactly what you want (so, if your squash is somehow perfectly cooked all the way through you should 1. weep in shame and 2. contact NASA and offer to sell them the craziest microwave from Planet Awesome). Peel and chunk that squash up. Some of it will mush and the rest will become, I don’t know, thumb sized chunks (your thumb, not mine, my thumb is midgety and weird).
Put on some water to boil for your rigatoni, add when boiling.
While your noodles boil fry up your sausage over pretty high heat. Once the sausage is cooked through add your squash, toss it a bit with the sausage, add about 1/4 cup of water, cover and turn the heat down to medium low (this would also be an awesome time to add, say, a chopped up apple or pear or walnuts or all of those things).
2 minutes before your rigatoni is done toss the collard greens into the pot with the noodles and stir. When the noodles are ready, reserve one cup of the noodle water and strain the rest out. Give it a goodly shake and unceremoniously dump it into the sausage/squash mix. Turn turn toss toss, the overcooked squash with start coating things up (add a bit of the reserved water to loosen things up if things get too sticky) and the rest of the squash stays in delicious chunk form. Whisk your orange zest/juice/sesame oil together and drizzle over the pasta and give it another goodly toss.
Serve with some parmesan.
Oh, also…
I am fat and so can you!
People have asked for it over and over and I am finally sharing it! It’s not that I meant to withhold it from you, it’s just that…well, I’m lazy and hadn’t gotten around to typing it up.
So, without further inane babbling, let me share with you my recipes for ginger caramels and espresso caramels.
I did a bunch of research on caramels and honed the basic ratios down to this:
1 cup sugar
1 cup heavy whipping cream (not ultra pasteurized)
1/2 cup light corn syrup
1/2 stick butter
If you use unsalted butter you might want to throw a pinch of salt in there. I use salted butter. You want to know why? Because I like it, that’s why!
I used to spend a lot of time in cooking newsgroups and forums and one thing above all else is true in any focused community: everyone has an opinion and they will be an asshole to the death to defend it. If there is one lesson I’ve learned over and over again in this great journey of going crazy and coming back again it’s that people’s opinions are a lot like their assholes, something you know to exist but you don’t really have to spend a lot of time thinking about. I use salted butter, I will put out a cheese platter before a meal with fish and I like bbq sauce on my ribs.
Okay, back to the caramels.
I recommend at least doubling this if not quadrupling or hectupling (sixtupling? 6xing?). It is much easier to control the temperature on a larger batch and you might even find that your candy thermometer won’t get an accurate read because it cannot be adequately submerged.
If you are making espresso caramels you will want 2 shots of espresso for every iteration of the base recipe. Today I made a quadruple batch so I had 8 shots of espresso in there. Mix your espresso, butter, cream, sugar and corn syrup together in the pot.
If you want to make ginger caramels you will want to make ginger syrup first. Ginger syrup goes like this: calculate out how much sugar you will need for your caramels (4 cups if you are quadrupling, etc) and dump that in your pot, with water at a 2:1 sugar to water ratio (the ratio doesn’t need to be super accurate). matchstick about a quarter hand of ginger for every cup of sugar, no need to peel it. Add the ginger to the sugar water and bring to a rolling boil (a rolling boil is a boil that is not diminished by stirring) and then reduce the heat and let it simmer for 10 minutes. Remove from heat and allow to cool. Strain the ginger out of the liquid and save to snack on later.
Put the ginger syrup into your pot with the butter and cream and corn syrup and then go on to the next step.
You’re going to want to use a big pot, like the big pot you boil pasta in. As this mixture starts to boil it expands like my ass at Thanksgiving. Cleaning the pre-caramel boil over mess from your stove is a job that sucks so bad that even terrible people feel bad about making nice people do it! BIG POT!! Use a BIG POT!!!
So you have everything in your BIG GIANT POT! bring the mixture to a boil over medium heat. Some people say that the heat can be turned all the way up for this, but I have found that when I have the heat on high for the initial boiling I tend to find scorched remains on the bottom of my pot. Could be a correlation not causation things, I don’t know, I use medium heat. Once the mixture is at a boil do not futz with it. You will want to futz with it, you will want to maybe stir it or shake it or mess with it. Don’t. Leave it alone. You will notice blops of protein scum forming on the surface and you will want to futz with those. Do not futz with them. they will be reabsorbed. DO NOT FUTZ!
At this point there is not much for you to do, you just let it boil and bubble away. Liberally butter a jelly roll pan and set aside. Then I recommend loading or unloading your dishwasher and maybe thinking about your butt for a while.
The mixture will stay at 212 degrees Fahrenheit/100 degrees Celsius for a long time. It will stay at that temp so long as there is water to be cooked out of the mixture. Once it starts rising above 212/100 degrees f/c you’ll want to keep a close eye on the thermometer.
Candy thermometer or that ice water thingy for measuring the temp of the mixture? If you are comfortable with the various stages of the ice water method (soft ball, firm balls, soft crack, hard crack, whatever) then by all means go for it. I find it to be futzy and I am never sure if I am doing it right so I stick with a candy thermometer.
Once the mixture hits 248 degrees Fahrenheit/120 degrees Celsius remove from heat and pour into your buttered pan. You’ll want to move quickly to get this off the heat and into the pan because it’s only a few degrees between chewy caramels and crunchy caramels (which are equally delicious, just harder to chew). I let them cool and set over night. When you’re ready with hundreds of little wax paper rectangles you can get down to the business of cutting and wrapping the individual candies, a repetitive and thankless activity that nonetheless makes distributing the caramels amongst your friends and family easier.
Please be careful when making caramels. This mixture gets hot, really really hot and sugar, especially very hot sugar, sticks to your skin. The burns hurt like hell and they hurt for a long time. Be careful!!!
Be careful and be delicious!
oh right, a thing happened
I went to Louisiana! On the way home I met an elephant.
I have much to write but it’s been exceedingly difficult to do all the things required to make a post, like form complete sentences, write the sentences, formulate coherent thoughts, type, breathe…
I probably need to take my welbutrin for a few days, it’s like ritalin for the slow people.
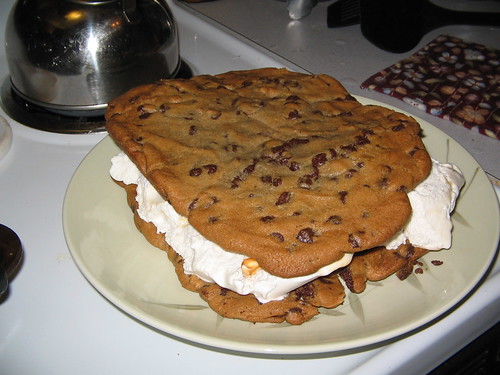
Also, I am still the queen of the homemade ice cream sandwich!


